Call Director
The Goldfish Call Director Service (Commonly known as IVR)
Call Director is also known as an IVR system. This allows you to create professional, multi-level menus which present your business in a much better and highly professional image. Below are the steps in order to set up your menus and the tools you may need to create them.
Audio Files
The system will allow you to upload either .mp3 or .wav files to your account via the “My audio files” section on the Control Panel. The basic anatomy of a sound file for the call direct goes like this:
“For sales: press one”
The message should always be first. In this case, this would be “For sales”, “for accounts” etc, followed by the press-button event on the dialler (1, 2, 3 etc). If your files are the other way around, “Press one for sales”, this is also fine – we can cover this at a later stage.
You can also order a professional prompt via the “My audio files” section on your Control Panel. They cost €60 per prompt up to 20 words and then €3 per additional word.
To upload an audio file, follow these steps:
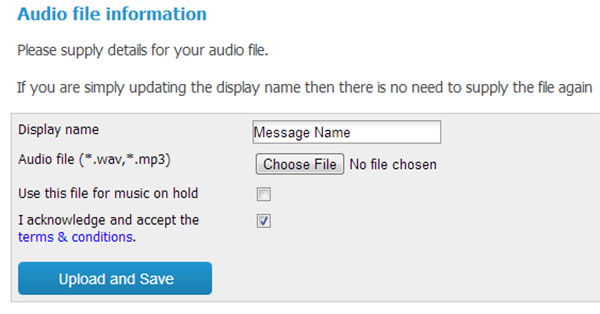
Log in to your Goldfish account and locate “My Audio files”
Select “Upload Audio file”
Give your message a name, this can be anything you wish
Tick the “I acknowledge and accept the terms & conditions” box and hit upload
This will then upload the audio file to your account

Creating your first Call Director Menu
Once we have your audio files uploaded to your Control Panel, we can now put them to use inside the Call Director menu. The following steps will show you how to create a simple menu and then how to attach it to your number.
Step 1: Creating your menu
On the Control Panel main screen, you will need to click on “Call Director” in order to create your first menu. Once inside the Call Director, you will see the following screen:

Give your menu a name and to add steps, simply click on “Click here to add a new step” and this will add a new step. You should have an idea on how many steps you want and then add them right away. Our example has two steps.

As you can see, I have “For sales, press one” and “For technical support, press two” selected. You will also see call routing on the right hand side. This is the routing that is followed upon a key press event. So if you were to press one, it would ring extension 1001 for 30 seconds and then go to voicemail.
Step 2: Configuring the Advanced Settings
If you’d like to create an audio file which includes “Press 1 for sales” you need to use the ‘Advanced Settings’. On the menu steps, for “Prompt to Play”, you should select ‘Silence’ and leave the “Selection Number” as is shown below:

In the advanced settings, for the “Selection Number”, this is where you select your own prompt. There are two reasons for this. One, it will pick your own recorded message and not one of our messages. Two, it will remove the “Press One” that we have by default. This is completed as shown below:

Congratulations, you’ve just created your first menu. Now we need to attach this menu to one of your numbers so that when a customer calls you, they will be guided through the menu.
Step 3: Adding the menu to your number
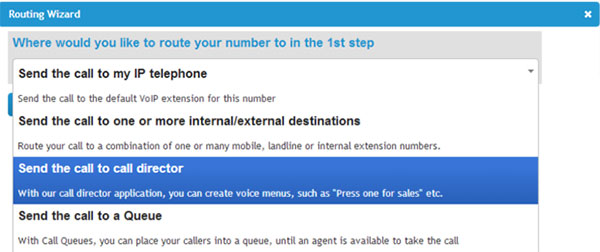
We need to change the ‘Call Routing’ for your number. Simply log in to your Goldfish account, click on “Your Numbers” and then select the number you wish to attach the menu to and then locate the “Routing Wizard” button and follow the steps below:

From the next screen, you now need to select the menu you will have created in the previous steps:

Once you have selected your Call Director menu, hit Finish and this will update the routing. This will take around 2-3 minutes to update.
NOTE: If you have a main number (DDI) and you attach the menu to this number, any phone configured to the number will not work. We recommend keeping a number free and using other numbers or extensions to set up with your phones.
